Welcome ,

PageCarton Documentation

Interested in coding widgets, classes, or methods? Check out the Code section!

Steps in Creating a Theme

Share

article by Ayoola Falola in Code , Advanced Topics , Design and Layout , Getting Started , PageCarton Lessons

The goal of creating a PageCarton theme is to help users of PageCarton create and customize their site and apps fast and easy. Creating a PageCarton theme is a very easy process but a lot of t...

The goal of creating a PageCarton theme is to help users of PageCarton create and customize their site and apps fast and easy. Creating a PageCarton theme is a very easy process but a lot of times, we should go an extra mile so that our users can even have more customization options.

Get a clean HTML-based template

Get your already-designed HTML-based template file ready. lt may be a template design of your own. A template in PageCarton is simply a ZIPed html files. You may as well get a clean HTML-based template (zip file) from w3layouts.com or similar sites. We have a list of other places you can get already designed HTML templates to start fast. Where to get Free HTML Templates to Build PageCarton Themes

https://youtu.be/HwR0FpfHJ5Q

Import the template into your PageCarton admin panel

You build the PageCarton theme from within a PageCarton Admin Panel. If you don't have your own copy of PageCarton installed, you may create a free account on PageCarton.com to begin to build themes ASAP.

https://youtu.be/pVMJa4Tarac

  1. Go to your PageCarton Admin Panel

  2. Click on 'Appearance' in the menu to the left

  3. Proceed to 'Themes'

  4. Click 'Upload new theme'

    • Enter a 'Theme name' of your chouse. The theme name should be the same name of the template if a template was downloaded from another source.

    • Upload your theme archive

    • Leave the 'Theme Update Options' as they are

    • Save to complete the process.

  5. Close the pop-up Screen

  6. The new theme should listed on the list of Themes.

  7. Under the new added theme, within the 'options' click on 'Preview' to confirm that all the components of the theme are displaying correctly. 


Integrate PageCarton Functions

PageCarton brings life into every HTML code by making it dynamic automagically. Contents will become easily manageable through different publishing methods in PageCarton. It only takes a few moments. Edit the theme to ensure people that want to build their websites and apps with it can do it effortlessly. That is the purpose of PageCarton Themes. Users of the theme should be able to use the basic tools to update the sites It is good to do all the updates in the 'Code View' of the HTML Text widgets. Basically, themes that will pass as Standard PageCarton Theme must:

  1. Be suitable for either of 'Blog', 'Corporate Site', 'E-commerce', 'Personal' categories of sites or any other categories listed on the PageCarton Themes Repository
  2. Be generic, so that if it is a blog theme, it could good for 'Fashion' blog and 'Politics'.
  3. All the theme contents must be editable using the 'Website Wizard' utility.

The standards are set to help us cater for our growing community of users at this point.

Update: We encourage that the new syntax be used to integrate PageCarton Functions instead of what is described below. Learn the new syntax here: HTML Syntax & API for Embedding Widgets - PageCarton Posts

Everything explained below is now obsolete. Visit the following link to continue building a theme HTML Syntax & API for Embedding Widgets - PageCarton Posts

....

Update Content

Follow the following steps to make this 

  1. On the list of themes and under the 'options' of the theme we are working on, click 'Edit Theme'

  2. On the popped up screen, click 'Edit Main Layout'

  3. When all is loaded, click on 'Widget Options', this should bring up a lot of options to add content

  4. Update the logo area to use the following HTML code

    <img style="max-height:100px;" src="/img/logo.png" alt="Organization Name">

    https://youtu.be/tXnBqz_M5-4

  5. Make all the forms work by embeding the in-built widgets using details on Linking HTML forms to PageCarton Forms. The following forms usually come with themes: 

    • Contact Forms

    • Email Opt-in Form

    • Sign in Form

    • Sign Up Form

    • Search Form

  6. Use the repleaceble static texts as defined in Standard Replaceable Texts to use in Building Themes. Replace all dummy text contents with these replaceable texts. 

    https://youtu.be/uw9JcqKE7b8
     

  7. If there are items like posts on the theme, embed all the posts so they can be automated using "Application_Article_ShowAll" widget. Watch this videos to understand more. Use only standard post types so that when users change themes, they don't need to add new content. Check out Standard Post Types Parameters in Embedding Widgets for the required parameters for specific post types. The following are other important parameters

    https://youtu.be/hRyzd_1edoI

    • 'add_a_new_post' - set to the number of post you want displayed by default e.g. 3. This will ensure there is a dummy post shown whenever the user have not added any content

    • length_of_description - limit the character lenght of the 'article_description' variable

    • length_of_title - limit the character length of the article_title variable.

  8. All dummy navigation links are to be removed.
  9. All navigation links and options not suitable for the category of themes should be removed and replaced with 'Ayoola_Menu' widget embedded.
  10. Other widgets to be embedded in the theme layout to build up dynamic contents themes are

    • Application_SiteInfo - to retrieve/access the site headline and description and the banner image from the database

    • Ayoola_Menu - to display navigation options

    • Ayoola_Page_Info - to retrieve/access current page headline and description from the database

  11. If the theme has a "Post Viewer" - a template of the page used to view a single article/post, '/single' page. Duplicate it as "/post-viewer"  to use it to view all posts or "/post-viewer-article" page to set it to view a specific post type. E.g. create '/post-viewer-article' to make a page a theme page to view post of article types. Embed the "Application_Article_View" widget on the page so it could retrieve the post data and display it on the page. The videos above will help understand how.

  12. Create the "/default-layout" page in theme pages. Since the theme can't possibly include all the site pages, the default layout is the layout to be used for the all system pages that is not included in the theme. That is the page that will be used to create/edit new pages when this theme is set as default. To create a "/default-layout" page, you would need to duplicate an existing theme page and name the duplicate "/default-layout".

Colors 

To futher allow users to personalize their sites it is important to provide flexibility in colors and theming of the pages. PageCarton users have been able to set prefered font colors and background colors for a long time, we could make use of this in our theme design. Beginners who are importing an existing templates should try as much as possible not to tamper with the template designs and colors. The following are the color guidelines:

  • Determine which color is the theme color. Usually, template designers have hard-coded this colors into their CSS files. 
  • Identify where the colors are used - the CSS classes, selectors, etc which are referenced.
  • Introduce inline CSS to overide the hardcoded declarations using the pagecarton color variables. This is an example of how to do this:
    • Insert a HTML widget at the top the 'Main Theme Layout'
    • Switch to Code View
    • Insert a codes similar to this below:
      <style>
      .bg-primary, .testimony-section .owl-dots .owl-dot.active, .gallery .icon, .ftco-footer .subscribe-form .form-group .submit:hover
      {
          background-color:  !important;
          color:   !important;
      }
      
      .btn.btn-primary 
      {
          background: ;
          border-color: ;
          color: ;
      }
      .btn.btn-primary:hover 
      {
          border-color: ;
          color: ;
      }
      .ftco-navbar-light .container, .bg-darken, .blog-entry .meta-date, .ftco-footer .subscribe-form .form-group .submit
      {
          background: #000 !important;
      }
      </style>


    • Click on advanced settings icon on the top right of the widget and embed any widget e.g. 'Application_Global'

    • Save the 'Main Theme Layout'. 

    • Go to Page Settings to set a background color and the font color and see if it displays when you preview the theme.

  • Try to limit the colors in the design to just the two colors, the defined background color and the font color.

  • And do not create new color elements, just change the colors to match those defined by the users through the variables '' and ''


Before Design After Design


Other things to do


  1. Test the theme by setting it as default and make sure all the pages are working.
  2. Export the theme
  3. Upload the theme to http://themes.pagecarton.org
  4. Share the theme info and link on social media
  5. Read more topics on Theme
  6. Watch videos on Building Themes for PageCarton
7 yrs ago

Resolving PageCarton Permission Issues

Share

article by Ayoola Falola in

PageCarton is by default configured to run from outside of the web root as a security feature. This ought to help secure the content and file structure from intrusion and hacking attempts. Good ...

PageCarton is by default configured to run from outside of the web root as a security feature. This ought to help secure the content and file structure from intrusion and hacking attempts.

Good thing is that most web server installations run using an independent user that still have write access to a step outside the web root. To explain this, if the webroot is /home/adegoke/public_html, the webserver also should be able to write to /home/adegoke. PageCarton by default then uses /home/adegoke for example to write both core and site data.

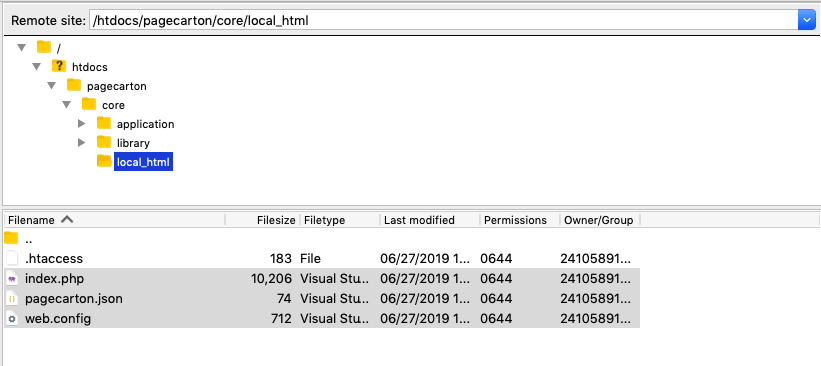
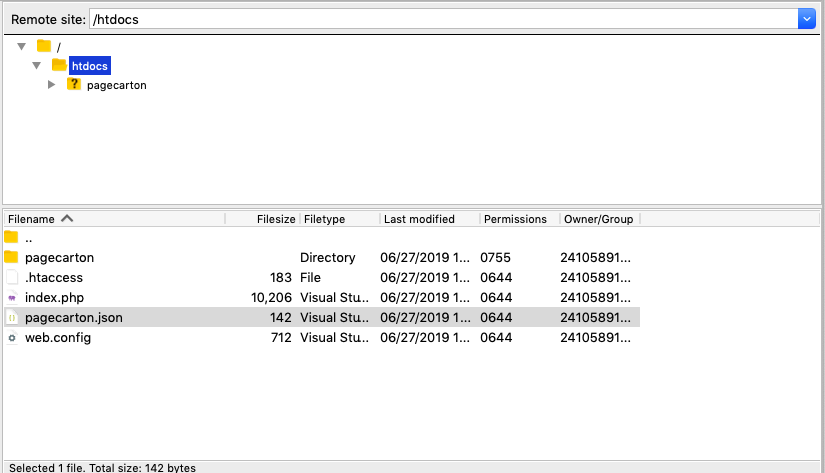
However, a lot of web server installations do not allow writing outside of the web, in this case, the available options is either to change the core and site directory from the default using the pagecarton.json configuration file. The configuration file must be placed in the web root. A sample configuration file can be found in /pagecarton/core/local_html

Permission issues in LAMPP

The root cause of the permission issues usually with LAMPP is that PageCarton assumes that the webserver is running as a user that has priviledge to access all files and directory within the web root and a directory above the web root. Usually the directory is recursively /opt/lampp on xampp linux server.

Why is this issue always with Linux XAMPP or LAMPP server?

1. LAMPP on linux runs as user "daemon" that does not have privilege to write to LAMPP directory. So whenever PageCarton want to extract installation file into /opt/lampp/pagecarton, it would not be able to do that because user daemon does not have write access on /opt/lampp/

2. If you extract it yourself, the files will be created on your own user account and the web server user would also not have access to write into the directory.

Solution

I'll share the two straightforward methods to solve permission issues with PageCarton. There are plenty methods to achieve the same thing.

1. Recursively change ownership of LAMPP directory /opt/lampp to the user the webserver is running on. Usually "daemon" or "www-data".  Installation should go smoothly after this. Run the following code on command line to change ownership.

$ chown -hR daemon:daemon /opt/lampp

(If web server is running as daemon user)

This is the recommended method. Do this after you have copied PageCarton files to web root in the location where you want it installed.

2. Create a new directory manually in LAMPP directory named "pagecarton"

Recursively change permissions on this directory to allow anyone to read and write to the directory. Do this after you have copied PageCarton files to web root in the location where you want it installed. Also recursively change permissions on the directory holding the pagecarton files in the htdocs to allow read and write by everyone.

$ chmod -R 0777 /opt/lampp/pagecarton
$ chmod -R 0777 /opt/lampp/htdocs

7 yrs ago

Cloning PageCarton Repository for Contribution

Share

article by Ayoola Falola in Advanced Topics , Getting Started , PageCarton Lessons

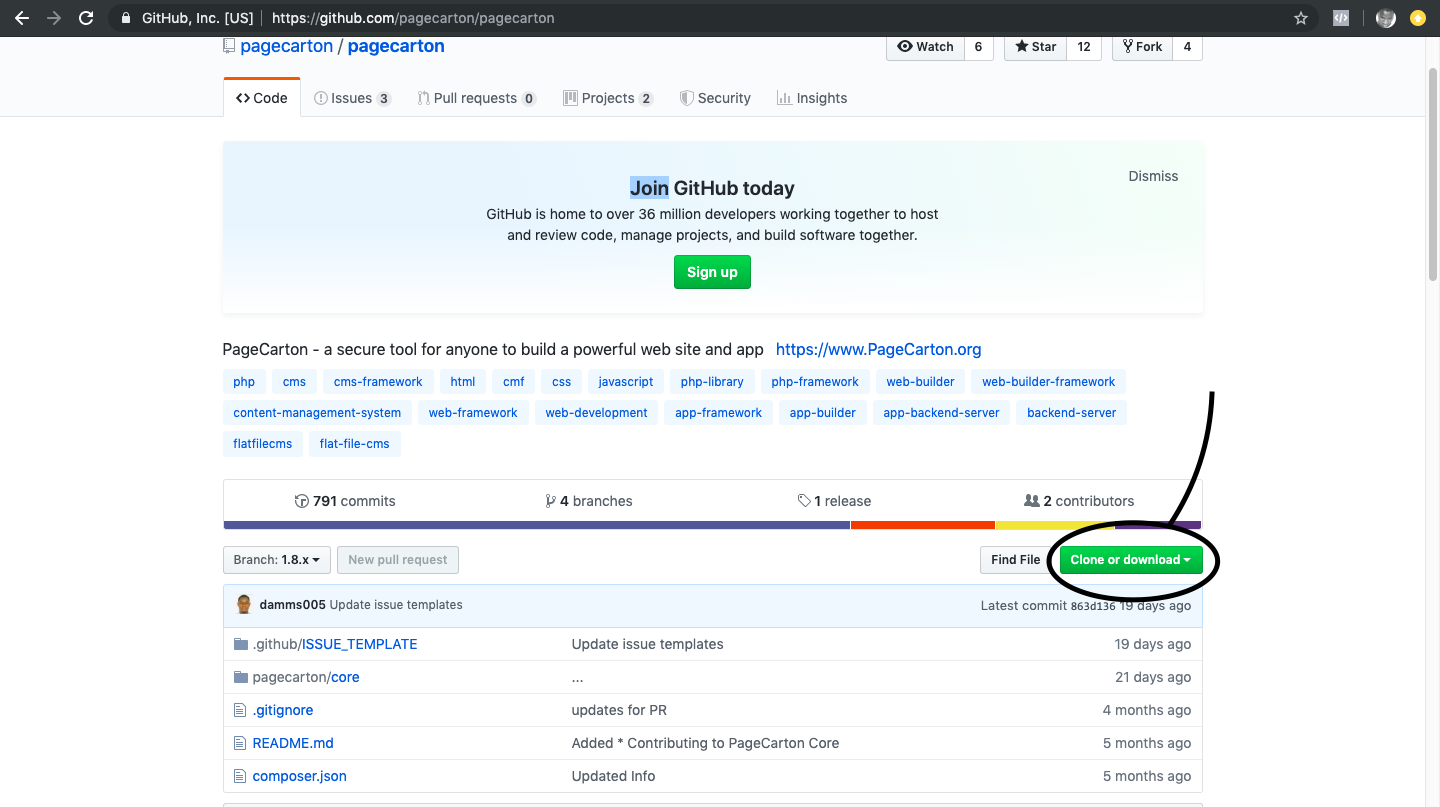
# move to where to want PageCarton cloned cd ~ # clone git repo branch you want to work on git clone -b https://github.com/pagecarton/pagecarton.git # edit pagecarton.json and set PC_BASE...
# move to where to want PageCarton cloned
cd ~

# clone git repo branch you want to work on
git clone -b https://github.com/pagecarton/pagecarton.git

# edit pagecarton.json and set PC_BASE to the full path to where "pagecarton" is located. 
# The "pagecarton" dir must be the directory containing the "core" directory 
nano pagecarton/core/local_html/pagecarton.json

# copy local_html files to the web root
# Use cp -r pagecarton/core/local_html/* www/sample-dir/ to install to a sub directory
# change www to location to full path to your web root
cp -r pagecarton/core/local_html/* www/


# set the right file ownership and permissions
# ideally, the pagecarton directory must be readable and writable 
# by the user running the web server.
# usually this user is www-data or apache or nginx or daemon
chown -hR www-data:www-data pagecarton

# alternatively, set global permissions  (not recommended)
# chmod -R 0777 pagecarton


7 yrs ago

Standard Post Types Parameters in Embedding Widgets

Share

article by Ayoola Falola in Design and Layout

It's good to use Standard Post Types Parameters in Embedding Widgets in themes so that when users change themes, similar posts made from previous themes can work in the theme one is building
Data Type Parameters
Our Services / What we do article_type="service"
Team Members article_types="team-member" && post_type_custom_fields="position,full_name,facebook_url,twitter_url,instagram_url,linkedin_url"
Products true_post_type="product"
Blog Posts article_types="blog-post" && true_post_type="article"
Portfolio / Project  article_types="portfolio" && true_post_type="link"
Slideshow article_types="slideshow"
Testimonial article_types="testimonial" && post_type_custom_fields="position,full_name"
Metrics article_types="metric" && post_type_custom_fields="number"
Gallery article_types="gallery-item"
Features / Why choose us article_types="feature"
Pricing article_types="pricing" && true_post_type="product" && post_type_custom_fields="feature_1,feature_2,feature_3,feature_4,feature_5"
Call-to-action article_types="call-to-action" && true_post_type="link"


7 yrs ago

Standard Replaceable Texts to use in Building Themes

Share

article by Ayoola Falola in Design and Layout

It is recommended to use standard replaceable texts with their dummy contents in building themes so that users changing themes doesn't need to update new contents. Contents of the previous theme th...

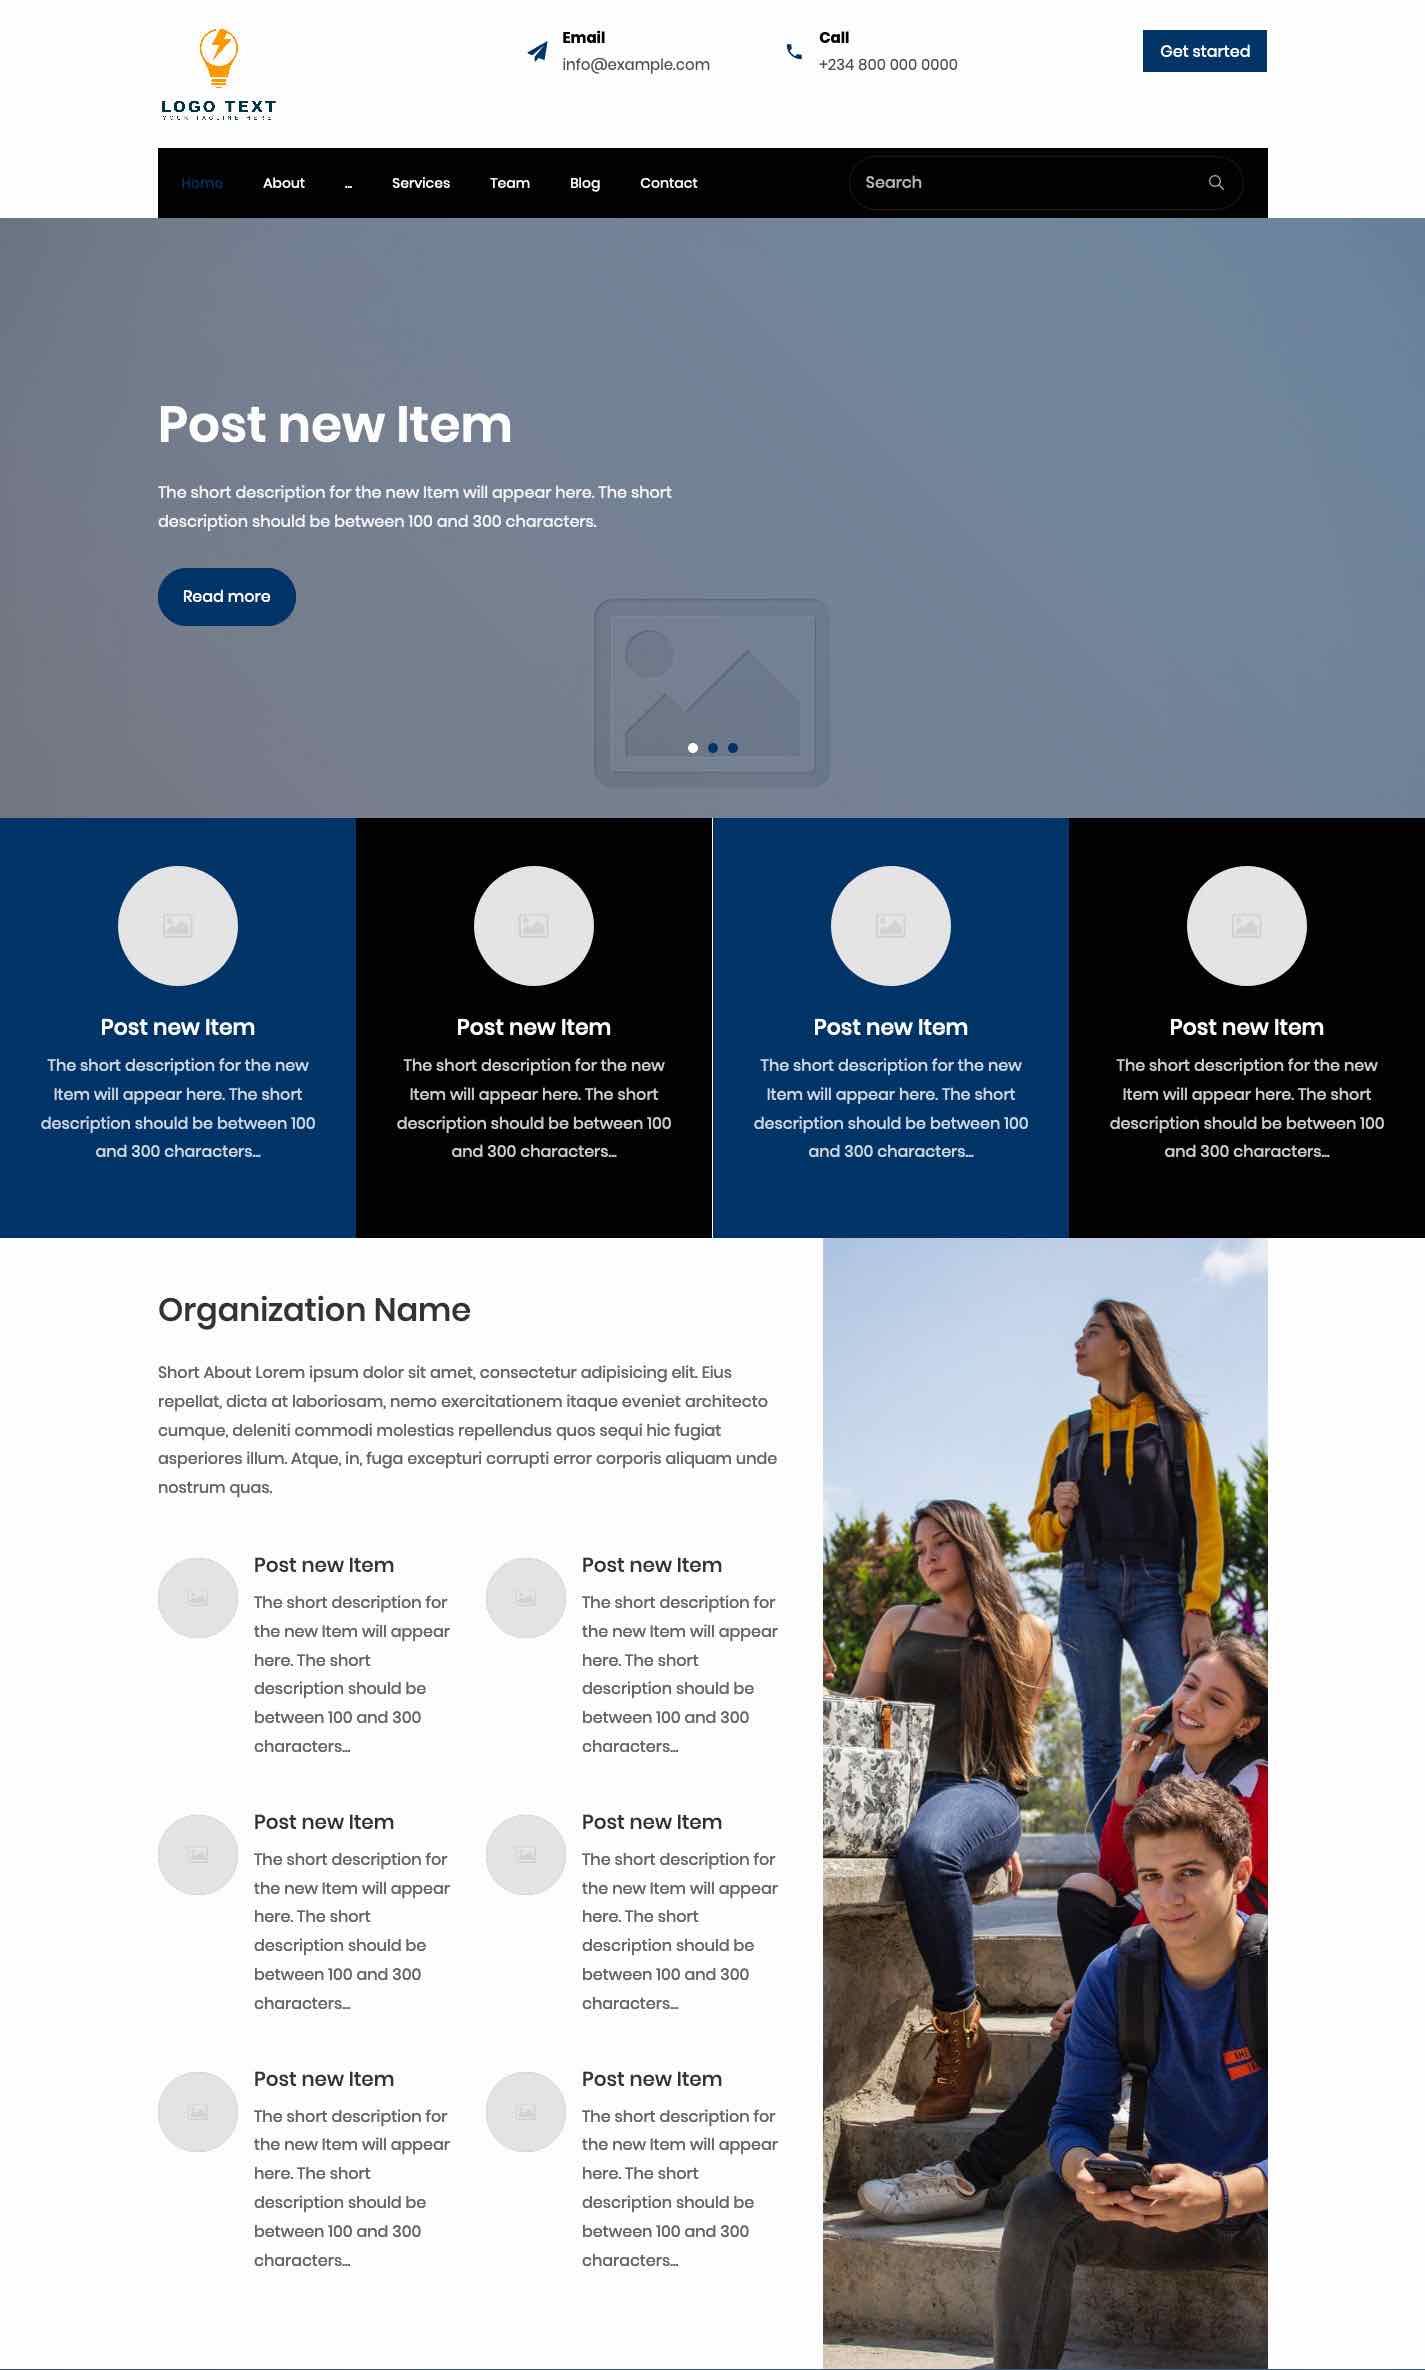
These are the standard static dummy texts to be used in themes so that users may easily update them in the New Site Wizard.

Organization Information

Organization Name
Organization Name

Short Description About Organization
Short About Lorem ipsum dolor sit amet, consectetur adipisicing elit. Eius repellat, dicta at laboriosam, nemo exercitationem itaque eveniet architecto cumque, deleniti commodi molestias repellendus quos sequi hic fugiat asperiores illum. Atque, in, fuga excepturi corrupti error corporis aliquam unde nostrum quas.

More About Organization
More About Accusantium dolor ratione maiores est deleniti nihil? Dignissimos est, sunt nulla illum autem in, quibusdam cumque recusandae, laudantium minima repellendus.

Background History of Organization
Background History Lorem ipsum dolor sit amet, consectetur adipisicing elit, sed do eiusmod tempor incididunt labore et magna aliqua. Ut enim ad minim veniam, quis nostrud exercitation ullamco laboris nisi aliquip ex ea consequat.

Contact Info

Street Address
City
State
Country

Phone Number 1
+234 800 000 0000

Phone Number 2 / WhatsApp
2348054449535

Email Address
info@example.com

Social Media

Facebook URL
https://www.facebook.com/PageCarton

Twitter URL
https://www.twitter.com/PageCarton

Instagram URL
https://www.instagram.com/PageCarton

LinkedIn Page URL
{https://www.linkedin.com/company/PageCarton}

Youtube Channel URL
https://www.youtube.com/channel/UCMjkDODU47J8iKKbaidQpEw?view_as=subscriber

Link to Descriptive Video
https://vimeo.com/channels/staffpicks/93951774

E-Commerce

E-commerce Shipping Information

{-Free Shipping Lorem ipsum dolor sit amet, consectetur adipiscing elit. Phasellus at iaculis quam. Integer accumsan tincidunt fringilla.-}

E-commerce Returns Information
{-Returns Lorem ipsum dolor sit amet, consectetur adipiscing elit. Phasellus at iaculis quam. Integer accumsan tincidunt fringilla.-}

E-commerce Support Information
{-Support Lorem ipsum dolor sit amet, consectetur adipiscing elit. Phasellus at iaculis quam. Integer accumsan tincidunt fringilla.-}

Other Information

Google Maps Embed URL
https://www.google.com/maps/embed?pb=!1m18!1m12!1m3!1d3956.7573964262942!2d3.862950314775586!3d7.381062994674082!2m3!1f0!2f0!3f0!3m2!1i1024!2i768!4f13.1!3m3!1m2!1s0x10398d11e9ff4445%3A0x27cd60c4ec4cbd97!2sNustreams+Conference+%26+Culture+Centre!5e0!3m2!1sen!2sng!4v1550769560125

Newsletter Write-up

{-Be the first to be notified when we have exciting offers and discounts. Sign up for our newsletter!-}

About Team Member

{-Meet the awesome personalities who make up our team-}

About Services

{-We offer the best in quality services. That is why we are the No. 1 in the industry-}


7 yrs ago

Explaining the concepts of PageCarton

Share

article by Ayoola Falola in About PageCarton , Working with PageCarton , PageCarton Lessons

This article is about answering technical questions on how PageCarton works.

Technicalities

Application Controller - controls how PageCarton behaves

index.php

The index.php controller receives all the requests from the user browser and sends it to the Ayoola_Application class run() method to complete the process.

/core/library/Ayoola/Application.php

This is changing to /core/library/PageCarton.php. This continues to process requests from index.php and serves the right file and output to the user. Determines where there the user is requesting a page, a post or an asset. It also checks to determine the correct site data to load in case of a multisite installation. It serves the request accordingly.

Pages

Computes and output html contents. All pages have URLs of format "/page/url". The homepage has URL "/". A page is usally loaded when a user goes to "http://example.com/page/url". Each page has three files:          

  • data.json
    (used to be data.xml or data.php). contains data saved about the page. Only used when page want to be edited. Previous data is retrieved here.        
  • include.php
    Contains widgets classes to instantiate and parameters. Loads the init() method of all the widgets embedded on the page. This is loaded first and sends the output to the template file. 
  • template.phtml
    Contains a structured copy of the appropriate theme to load the contents of the page. Picks data from include.php and runs the view() method of all the widgets embedded on the page.

Location of these files:

{APPLICATION_PATH}/pages/*


Page-related Widgets, Settings and Database Tables are located on

/core/library/Ayoola/Page/*

Posts

Posts are structured data that can be set to have similar attributes and can be categorized. Examples of posts are articles in a blog settings, products in an e-commerce settings, poll, quiz etc. A number of post are defined in a default PageCarton installation but it also comes with the ability for users to define new post types, new categories and post attributes.

Post-related Widgets, Settings and Database Tables are located on

/core/application/modules/Application/Article/*

Each posts have records saved in the post tables /core/application/modules/Application/Article/Table.php. Post must have a unique "article_url" field that is usually deduced by the "article_title" entered by the user of the format "/2019/01/01/sample-article-title.html".

Site Assets

Site assets are images, CSS, JS, fonts and any kind of asset the site may have. The urls usually is of the form "/path/to/file.ext"
        
Location of these files:

{APPLICATION_PATH}/documents/*


Related Widgets, Settings and Database Tables are located on

/core/library/Ayoola/Doc/*

Widgets

A widget is a unit of a coordinated process in PageCarton. It is a means whereby PageCarton transmits a calculated response to the user. With the "$widget->init()" method, a widget runs the logic of the unit. It uses the "$widget->setViewContent( 'HELLO WORLD' )" method within the init process to send output to the user but the user will not see anything until the "$widget->view()" method is "echoed" to the user.


The widget comes with a number of features and options, for example, a widget can output content in different types depending on the set "play mode" parameter. It courrently can output content in the following formats:

  • HTML
  • XML
  • JSON
  • ENCRYPTION
    • using OPENSSL
  • PHP serialize()

The ability for widgets to communicate in different output types makes it perfect to build standalone applications that can integrate to third-party systems and front-end frameworks. A widget can "hook" to other widgets to provide related extended functionality for the widget. At specific points in a widget process, the registered hooks for the widget is called and runned, exchanging some vital parameters that could be used to affect the individual widget process.

Widgets allow setting of parameters that are like constants to change the behavior of the widget running in a particular instance. Parameters are usually set whenever a widget is instantiated whether in the page layout editor or in the code of another widget that is instantiating it. In the code, parameters are set with the setParameter method. The set parameters will be available by calling the getParameter method. They also can generate data options that are like variables that can help to show dynamic data in view. The data options are usually set in the init() method.

New widgets are classes extending the PageCarton_Widget class. New widgets can be created from the PageCarton Admin Panel but the file cannot be edited from the web browser.

Related Widgets, Settings and Database Tables are located on

/core/library/Ayoola/Object/*

Read More on Widgets

Databases

Databases are where PageCarton stores structured data. PageCarton comes with an integrated Database system that can be used for almost anything. One can also use any other third-party database. New widgets can be created from the PageCarton Admin Panel but the file cannot be edited from the web browser for security reasons.
Read more on Database Tables

Settings

Settings are special database tables that stores related data for quick retrieval and for in-widget operations. Plugins also can come with their own settings. A settings file can also be created from the PageCarton Admin Panel

Read more on Settings Module


What happens when [needs content]

  •     PageCarton is being installed?
  •     A user requests a PageCarton site
  •     A contributor commits a file
  •     User upgrades a pagecarton installation

File structures in PageCarton

Application Directories {APPLICATION_DIR}

Types:

  • core
    • /pagecarton/core/*
  • default site
    • /pagecarton/sites/default/*
  • plugins
    • /pagecarton/sites/*/extensions/{plugin_name}/*
  • directory multisites
    • /pagecarton/sites/default/{site_directory}/*
  • domain multisites
    • /pagecarton/sites/{domain}/*

Possible contents

  • library/
    • only core has this
    • contains all the classes PageCarton really needs for a good run
  • local_html/
    • contains files that's automatically copied to the site web root
    • only core has this
    • contains
    • index.php
    • web.config (for IIS)
    • .htaccess (for Apache)      
  • application/
    • all application directories can have this
    • referred to as {APPLICATION_PATH}
    • can have the follow directories
      • documents/
      • databases/
      • pages/
      • modules_files/
      • {multisite_dirs}/
  • extensions/
    • Plugins are installed here
    • can contain it's own contents of {APPLICATION_DIR}

How can the core be edited for collaboration?

Cloning the GIT repository

# start from the web root
cd www

# move a step out of the web root
cd ../

# clone git repo branch you want to work on
git clone -b 1.8.x https://github.com/pagecarton/pagecarton.git

# copy public_html files to the web root
# Use cp -r pagecarton/core/local_html/* www/sample-dir/
# to install to a sub directory
cp -r pagecarton/core/local_html/* www/

# set the right file ownership and permissions
# ideallly, the pagecarton directory should be readable and writable 
# by the user running the web server.
# usually www-data or apache or nginx or daemon
chown -hR www-data:www-data pagecarton

Two ways to update core code

  1. Edit the core files directly 
    • Locate the file you want to update within pagecarton/core,
    • change
    • commit and
    • push to git
  2. Make your changes in the web browser
    By default, on a fresh installation of PageCarton, whenever you make changes to the website, the core files are not changed. Your changes go to a separate {APPLICATION_DIR} in the /pagecarton/sites/ directory. To run a "core" version of pagecarton on the browser, you need to create a configuration file in the {APPLICATION_DIR} you want to use and name the file "pagecarton.json" (/pagecarton/sites/default/pagecarton.json). Put this json code '{ "ignore_this_directory": true }' (without the single quotes) and save the file. Once you do this, all your changes on the site will go to the "/pagecarton/core" and not "/pagecarton/sites/default". Use the following steps
    1. Properly Install PageCarton
      • Go to localhost/personalize in the browser
        Change localhost to the respective domain name if you are working on a LIVE server like example.com. Use localhost/sample-dir/personalize if you installed in a directory. Use localhost/index.php/personalize if you don't have URL rewriting capabilities on your web server.
      • Create admin user and set other preferences
      • Proceed to the admin panel at localhost/pc-admin
    2. Create a multisite instance where you will update PageCarton
      1. Go to localhost/widgets/PageCarton_MultiSite_List
      2. Create a new site. Name the site directory anything e.g. "core-v"
      3. Preview the new site or go to localhost/core-v/
      4. Create pagecarton configuration file for the new site - pagecarton/sites/default/core-v/pagecarton.json
        # pagecarton/sites/default/core-v/pagecarton.json
        {
            "ignore_this_directory": true
        }


      5. Now localhost/core-v/ will load the core as the "site" and any updates on it will go straight to the core. Confirm this by going to localhost/core-v/pc-admin to see all the core pages, and other settings loaded.
      6. Make required changes
      7. Commit Changes on the core
      8. Push changes to GIT

How is Git linked to the update server

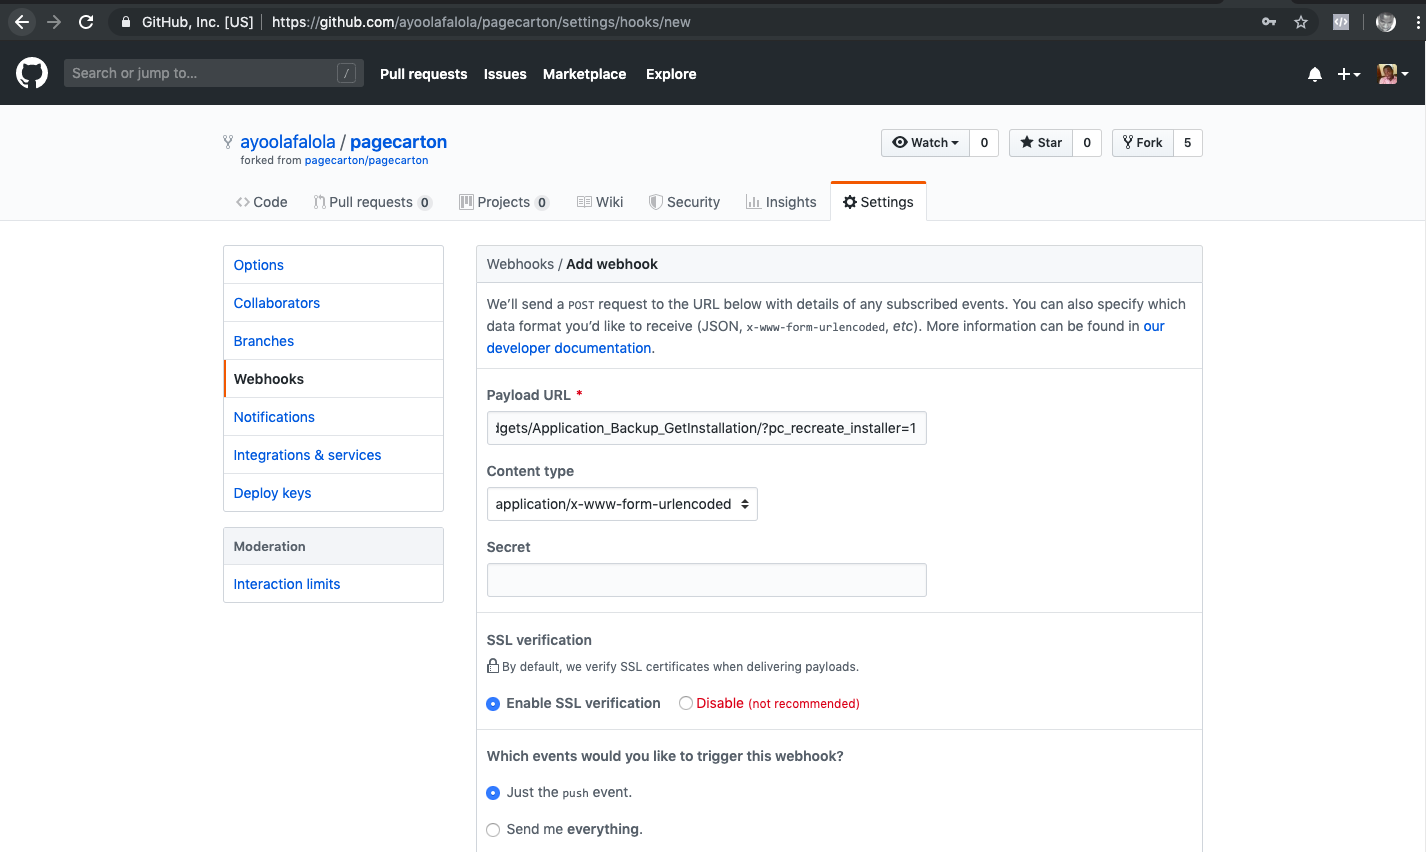
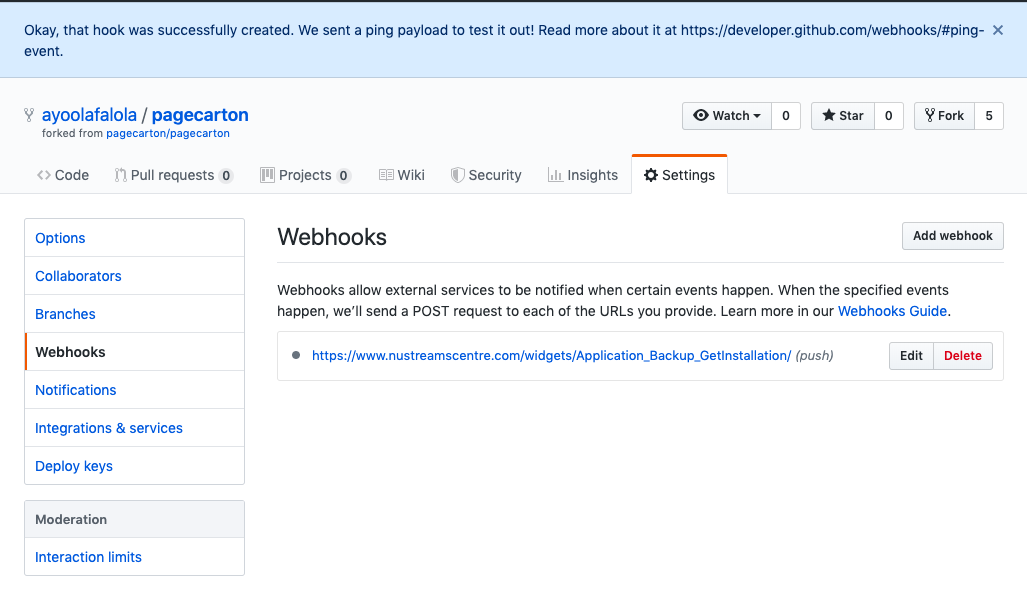
Once a commit is made and files pushed to the github, there is a hook on github that sends the updated repo to the update server. It's automated that the users get freshly baked software everytime.

How is Themes integrated with PageCarton? [needs content]

How is Plugins integrated with PageCarton? [needs content]

How is Documents and files saved and retrieved in PageCarton? [needs content]


7 yrs ago
← Previous Next →